Writing
Using MKDocs is easy—you don't need coding experience. All your content is in the Docs folder.
Getting Started
- To get started, type this command in your terminal.
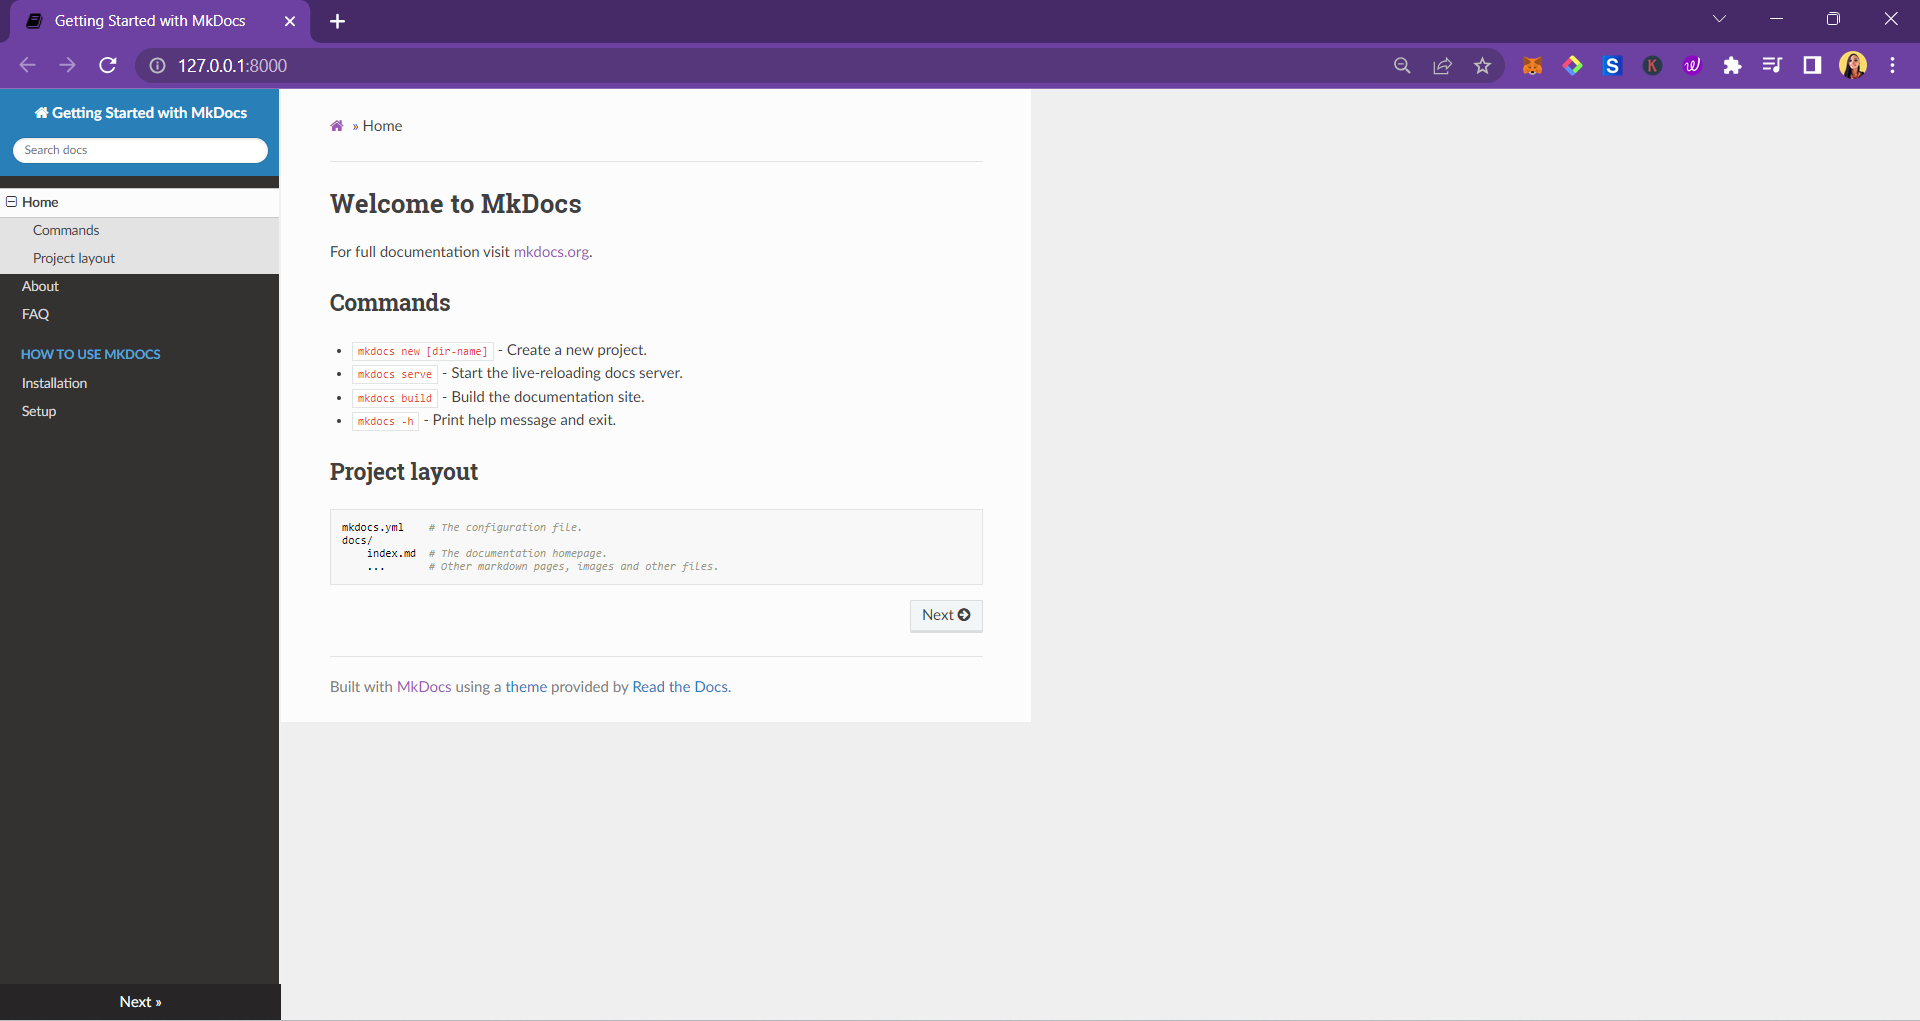
cd my-project // Use the name for your project - For a preview of your site, start the server by running the command
mkdocs serve - Click on ‘Ctrl’ +
http://127.0.0.1:8000/to view the default web page.
Making Changes
To make some changes to your site, follow these steps:
-
Heading
-
Change the site name in the
mkdocs.ymlfile and save your changes.
site_name: First Doc Site
-
Adding pages
-
Navigate to the
docs/folder and create new files, for example,firstpage.mdandsecondpage.md. See How to Create Files and Folders in VS Code for more information. - Type in your content using Markdown. For more information, see markdown syntax.
- Save your work.
- Go to
mkdocs.yml, add the newly created files in this format, and save your changes.
  site_name: Getting Started with MkDocs
   nav:
     - Home: index.md
     - About: firstPage.md
     - FAQ: secondpage.md
-
Nesting
-
This is grouping pages under a parent page; this makes your site organized and easy to navigate.
- Create a new folder in the
docs/folder; this will be the parent page. - Create new markdown (.md) files in the new folder and add the content or text on these pages.
- Open the
mkdocs.ymlfile under thenavsection and add the parent page and its sub-pages in the format below.
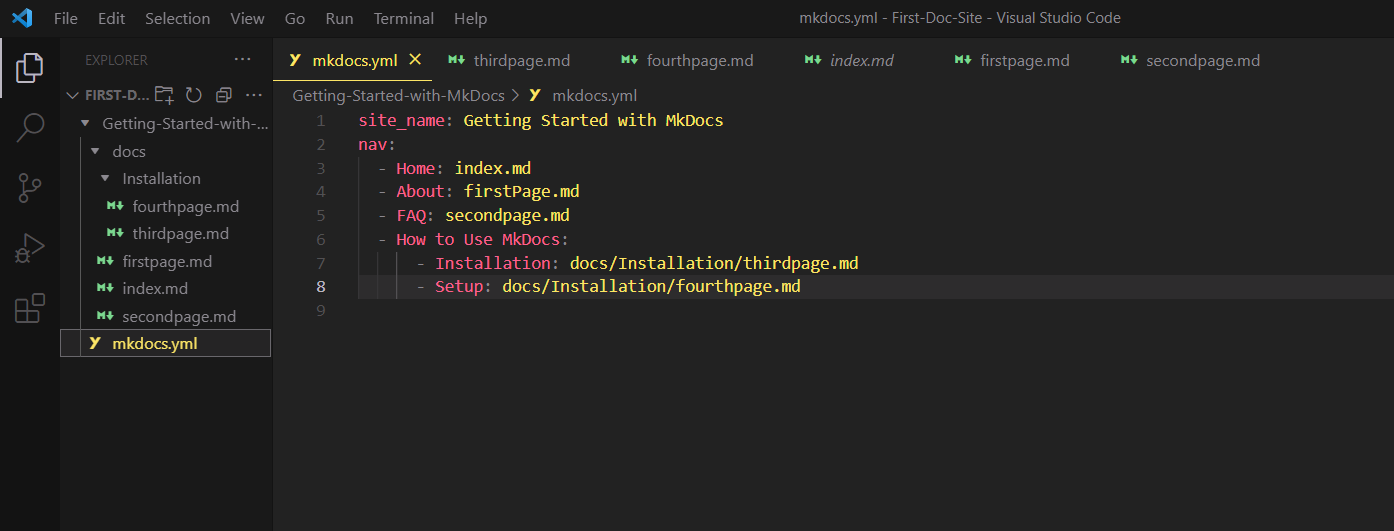
Remember to indent your YAML file